Reference for the workflow commands you'll run day-to-day. Setup commands — wavedash auth * and wavedash update — live with Authentication and Installation.
Initialize a project
wavedash init
Interactively scaffolds a wavedash.toml in the current directory. Detects Godot or Unity from the project files (otherwise treats the folder as a custom web build), prompts you to pick or create a team and a project, and writes the matching config. If a wavedash.toml already exists, you'll be asked whether to reinitialize.
Requires authentication — run wavedash auth login first.
Teams and projects
Most users set up their team and project interactively via wavedash init. These scripted commands are useful for CI or when you already know the IDs you want to pass around.
wavedash team create --name "My Studio"
Creates a new team and prints the team ID plus its Developer Portal URL.
| Option | Description |
|---|---|
--name <NAME> | Team name (required) |
wavedash team list
Lists every team you belong to. Prints a table with ID, Slug, and Name columns. Pass --json to get a JSON array instead — easier to pipe into other tools.
| Option | Description |
|---|---|
--json | Output as a JSON array instead of a table |
wavedash project create --title "My Game" --team-id <TEAM_ID>
Creates a new project under the given team and prints the project ID plus its Developer Portal URL. The project ID is what you put in wavedash.toml as game_id.
| Option | Description |
|---|---|
--title <TITLE> | Project title (required) |
--team-id <TEAM_ID> | ID of the team that owns the project (required) |
wavedash project list --team-id <TEAM_ID>
Lists every project (game) owned by the team. Prints a table with ID, Slug, and Title columns. Pass --json to get a JSON array instead.
| Option | Description |
|---|---|
--team-id <TEAM_ID> | ID of the team to list projects for (required) |
--json | Output as a JSON array instead of a table |
Local development
wavedash dev
Launches the Wavedash Dev app, which runs your game inside the Wavedash sandbox so you can test the SDK, achievements, and other platform features before pushing a build. The CLI reads upload_dir from wavedash.toml, registers a temporary local build with the API, and opens the sandbox pointed at it. The first run downloads the dev app; subsequent runs reuse it.
| Option | Description |
|---|---|
-c, --config <PATH> | Path to wavedash.toml (default: ./wavedash.toml) |
--no-open | Don't automatically open the browser; just print the local URL |
The sandbox validates your SDK wiring locally. It does not replace a final smoke test of the uploaded build on Wavedash.
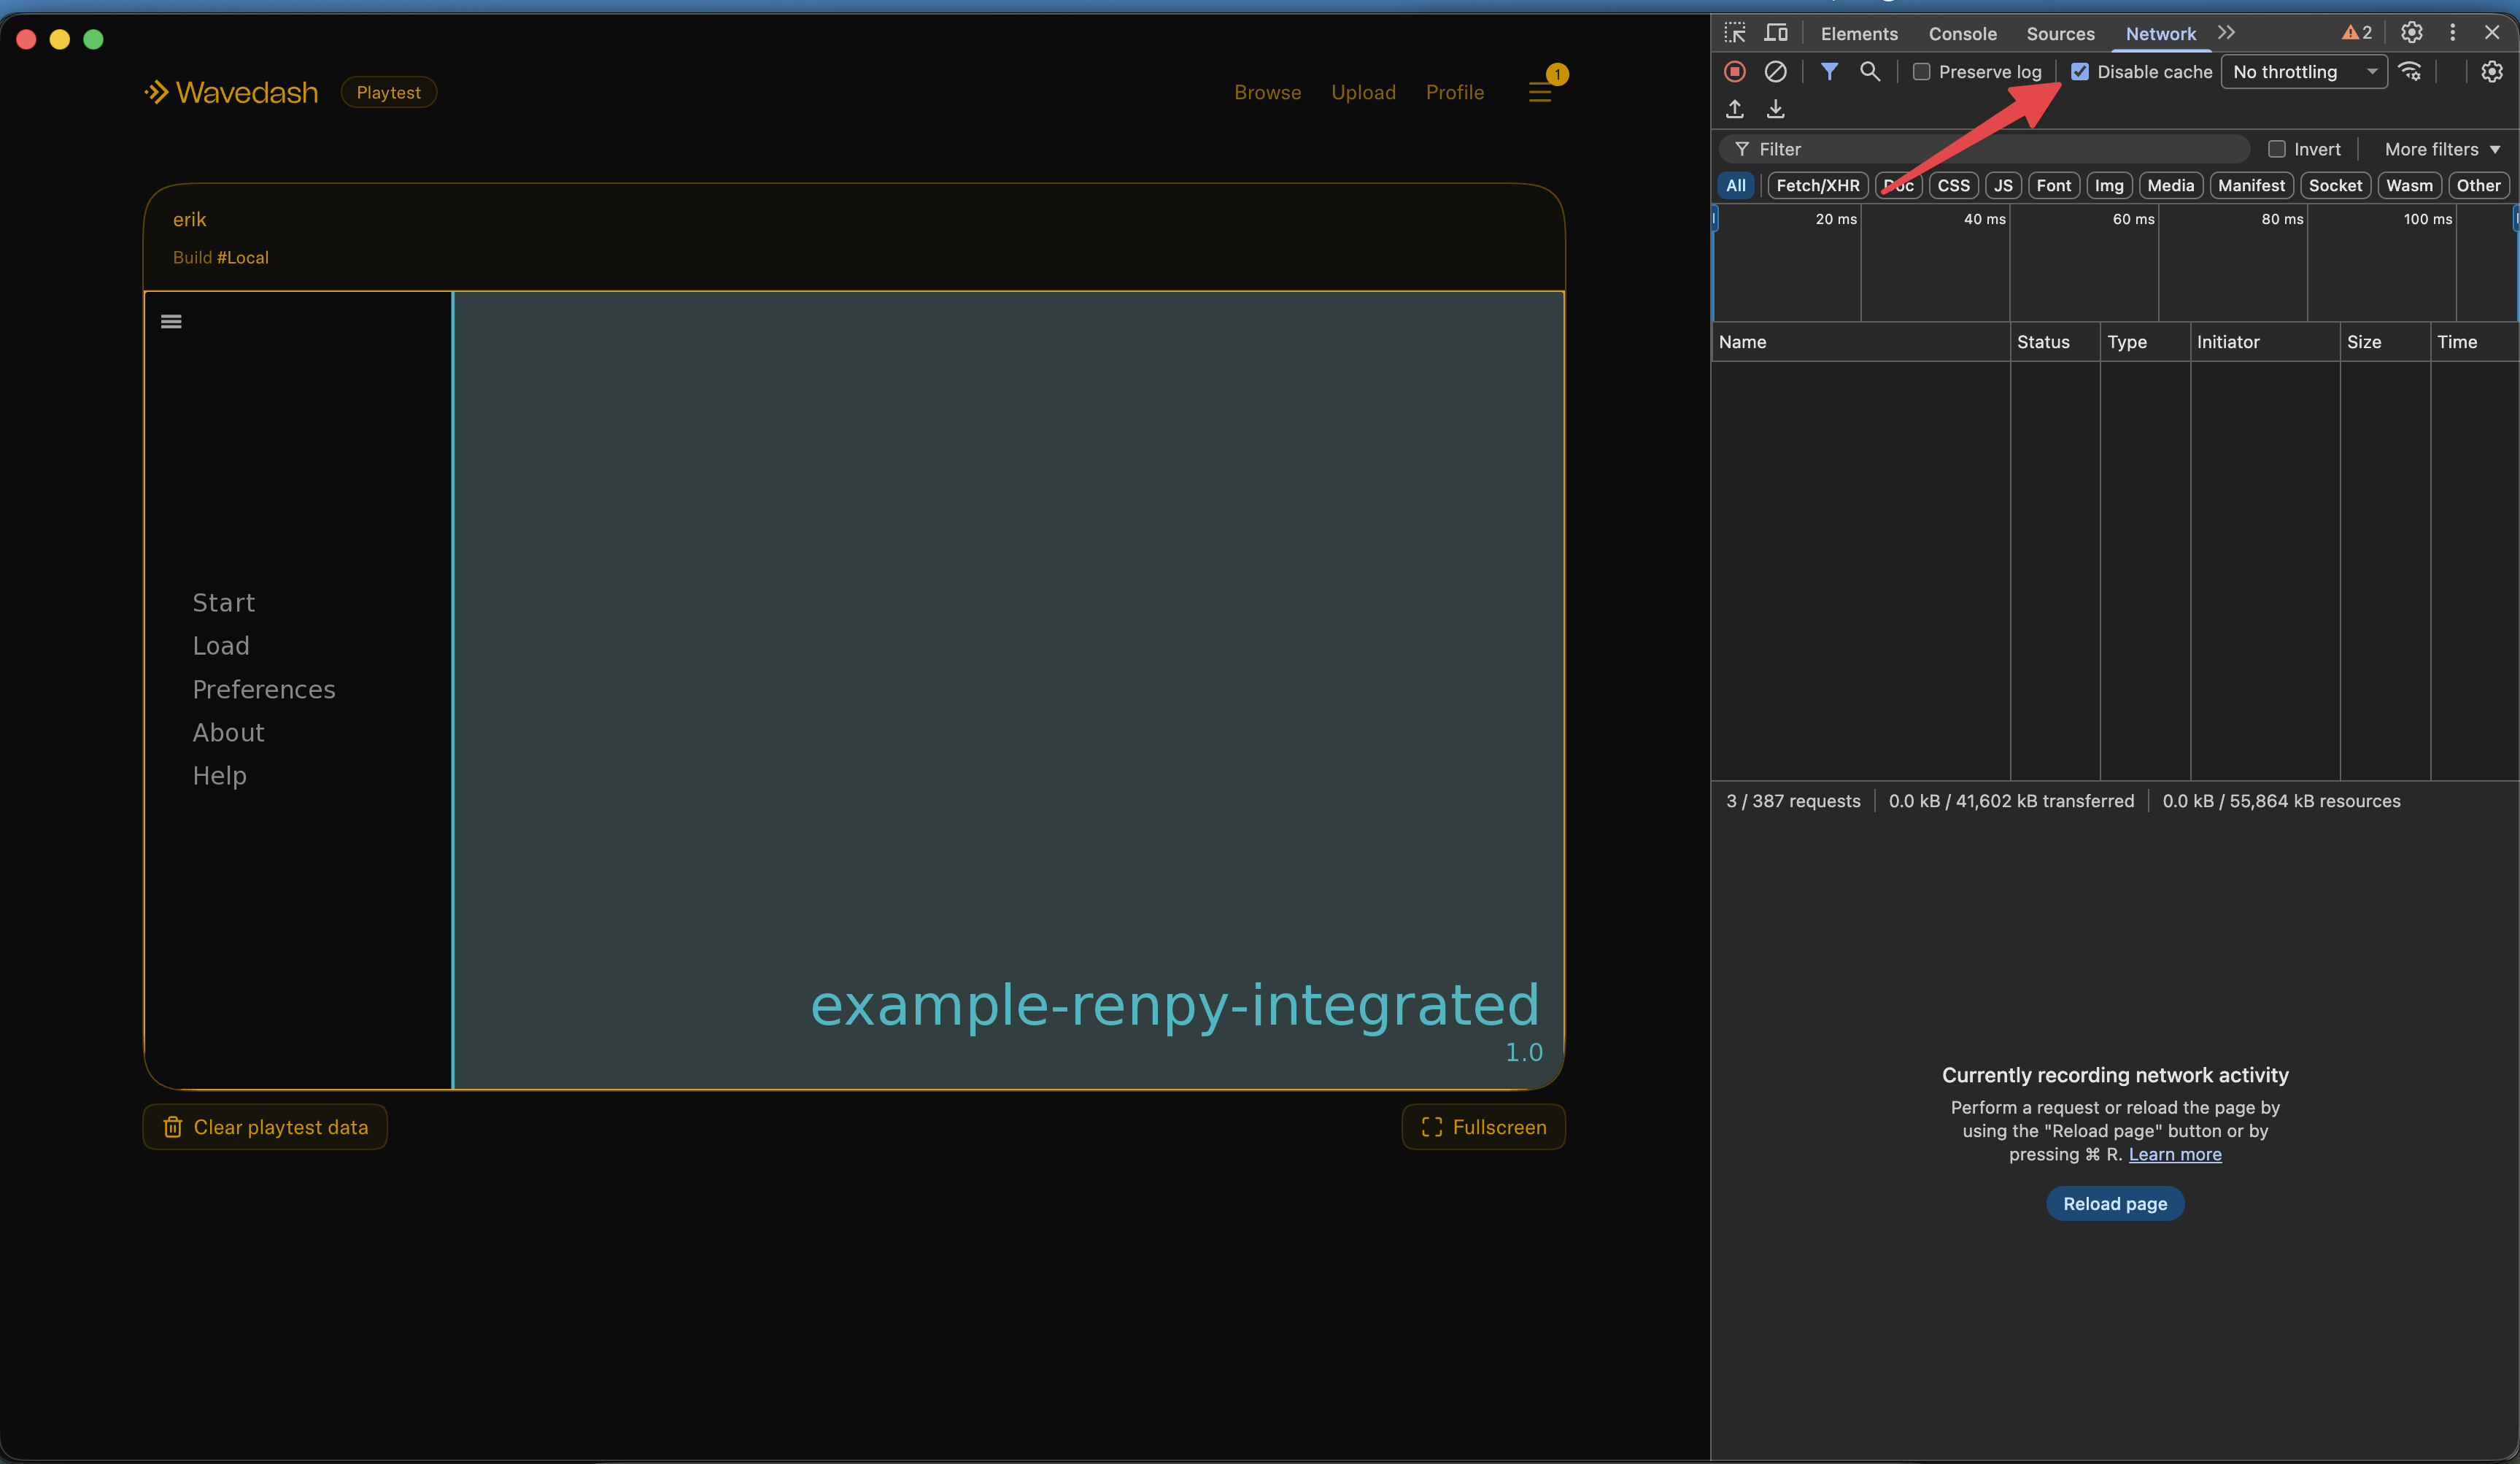
Stuck seeing old assets?
If the dev app keeps showing an old version of your game after you rebuild, hit Cmd+Shift+R (Force Reload) to reload without the cache. You can also open DevTools, go to the Network tab, and check Disable cache — that bypasses the cache for as long as DevTools is open.
Build and push
wavedash build push
Uploads everything under upload_dir and registers a new immutable build for the configured game_id. Old builds stay available for rollback. When the upload finishes, the CLI prints the build's ID and a playtest URL.
| Option | Description |
|---|---|
-c, --config <PATH> | Path to wavedash.toml (default: ./wavedash.toml) |
-m, --message <TEXT> | Build description or changelog note |
Uploading does not publish the build. Use the printed build ID with wavedash publish, or open the Developer Portal and promote the build when you're ready to make it live.
Verify config
Confirm game_id and upload_dir match your engine output.
Push
Run wavedash build push and wait for the new build ID.
Publish
Run wavedash publish <BUILD_ID> or publish the uploaded build from the Developer Portal.
Publish a build
wavedash publish <BUILD_ID>
Makes an uploaded build live for players. Copy the build ID from the Build ID line printed by wavedash build push, or from the Developer Portal builds list.
| Argument | Description |
|---|---|
<BUILD_ID> | Build ID returned by wavedash build push |
| Option | Description |
|---|---|
-c, --config <PATH> | Path to wavedash.toml (default: ./wavedash.toml) |
--title <TEXT> | Release title |
--summary <TEXT> | Release summary |
--added <TEXT> | Added change item; pass multiple times for multiple items |
--removed <TEXT> | Removed change item; pass multiple times for multiple items |
--fixed <TEXT> | Fixed change item; pass multiple times for multiple items |
--adjusted <TEXT> | Adjusted change item; pass multiple times for multiple items |
Example with release notes:
wavedash publish <BUILD_ID> \
  --title "Version 1.0.1" \
  --summary "Small polish pass." \
  --fixed "Fixed fullscreen sizing" \
  --adjusted "Tuned input timing" \
  --adjusted "Updated default settings"
Stats
Stats are per-game counters that the SDK reports. They power stat-triggered achievements and surface as user progress on the Wavedash side.
Every stat command accepts --game-id <GAME_ID> to target a game explicitly. When omitted, the CLI reads game_id from the wavedash.toml at --config (default ./wavedash.toml). If you aren't running from a project directory, find the ID with wavedash project list --team-id <TEAM_ID> and pass --game-id directly.
wavedash stat create --identifier KILLS_TOTAL --name "Total Kills"
Creates a stat. --identifier is the stable string you reference from your game code; --name is the human-readable display name shown in the Developer Portal.
| Option | Description |
|---|---|
--identifier <IDENTIFIER> | Stat identifier, e.g. KILLS_TOTAL (required) |
--name <NAME> | Display name (required) |
--game-id <GAME_ID> | Game ID; defaults to game_id in wavedash.toml |
-c, --config <PATH> | Path to wavedash.toml (default: ./wavedash.toml) |
wavedash stat update --id <STAT_ID> --identifier KILLS_TOTAL --name "New Display Name"
Updates a stat's identifier and display name. Both --identifier and --name are required — the command rewrites both fields. <STAT_ID> is the document ID returned from stat create.
| Option | Description |
|---|---|
--id <STAT_ID> | Stat document ID (required) |
--identifier <IDENTIFIER> | New identifier (required) |
--name <NAME> | New display name (required) |
--game-id <GAME_ID> | Game ID; defaults to game_id in wavedash.toml |
-c, --config <PATH> | Path to wavedash.toml (default: ./wavedash.toml) |
wavedash stat delete --id <STAT_ID> [--force]
Deletes a stat. If any user progress is attached to the stat, the command refuses to delete unless --force is passed.
| Option | Description |
|---|---|
--id <STAT_ID> | Stat document ID (required) |
--force | Delete even when user progress records exist for this stat |
--game-id <GAME_ID> | Game ID; defaults to game_id in wavedash.toml |
-c, --config <PATH> | Path to wavedash.toml (default: ./wavedash.toml) |
Achievements
Achievements unlock either when your game calls the SDK directly (standard) or automatically when a stat crosses a threshold (stat-triggered).
Every achievement command accepts --game-id <GAME_ID> to target a game explicitly. When omitted, the CLI reads game_id from the wavedash.toml at --config (default ./wavedash.toml).
wavedash achievement create \
  --identifier FIRST_WIN \
  --title "First Win" \
  --description "Win your first match."
Creates a standard achievement. Add --triggered-by-stat-id <STAT_ID> --threshold <N> to make it stat-triggered, --secret to hide it until unlocked, and --image <PATH> to attach an icon (jpg, jpeg, png, or webp).
| Option | Description |
|---|---|
--identifier <IDENTIFIER> | Achievement identifier, e.g. FIRST_WIN (required) |
--title <TITLE> | Display title (required) |
--description <TEXT> | Achievement description (required) |
--secret | Hide the achievement until a player unlocks it |
--triggered-by-stat-id <STAT_ID> | Stat document ID that auto-unlocks this achievement |
--threshold <N> | Stat value required to unlock (required when --triggered-by-stat-id is set) |
--image <PATH> | Path to an icon file (jpg, jpeg, png, webp) |
--game-id <GAME_ID> | Game ID; defaults to game_id in wavedash.toml |
-c, --config <PATH> | Path to wavedash.toml (default: ./wavedash.toml) |
wavedash achievement update --id <ACHIEVEMENT_ID> [flags]
Updates only the fields you pass. Pass --triggered-by-stat-id "" (empty string) to clear an existing stat trigger and turn the achievement back into a standard one.
| Option | Description |
|---|---|
--id <ACHIEVEMENT_ID> | Achievement document ID (required) |
--identifier <IDENTIFIER> | New identifier |
--title <TITLE> | New display title |
--description <TEXT> | New description |
--secret <true|false> | Toggle the secret flag |
--triggered-by-stat-id <STAT_ID> | Set a new stat trigger, or "" to clear |
--threshold <N> | New stat threshold (required when setting --triggered-by-stat-id) |
--image <PATH> | Replace the icon with a new image (jpg, jpeg, png, webp) |
--game-id <GAME_ID> | Game ID; defaults to game_id in wavedash.toml |
-c, --config <PATH> | Path to wavedash.toml (default: ./wavedash.toml) |
wavedash achievement delete --id <ACHIEVEMENT_ID> [--force]
Deletes an achievement. If any user has unlocked it, the command refuses to delete unless --force is passed.
| Option | Description |
|---|---|
--id <ACHIEVEMENT_ID> | Achievement document ID (required) |
--force | Delete even when user unlock records exist for this achievement |
--game-id <GAME_ID> | Game ID; defaults to game_id in wavedash.toml |
-c, --config <PATH> | Path to wavedash.toml (default: ./wavedash.toml) |
Global options
These flags apply to every subcommand:
| Option | Purpose |
|---|---|
--version | Print CLI version |
--help | Show help for the command |
--verbose | Increase log detail |